
Attacker
Enemy
HSR Damage Calculator
In Honkai: Star Rail, figuring out how much damage a character can actually deal is not always as simple as looking at their ATK. Relics, Light Cones, Traces, Eidolons, Crit stats, buffs, debuffs, enemy defenses, and weaknesses can all affect the final damage.
That is where an HSR Damage Calculator can come in handy. Instead of guessing which build is better, you can enter your character’s stats and test different setups to see how much the damage changes. It is a useful way to compare builds before spending time or resources on upgrades.
Whether you are building a new DPS or trying to improve a character you already use, the calculator can give you a better idea of which stats and upgrades are actually making a difference.
How to Use the HSR Damage Calculator
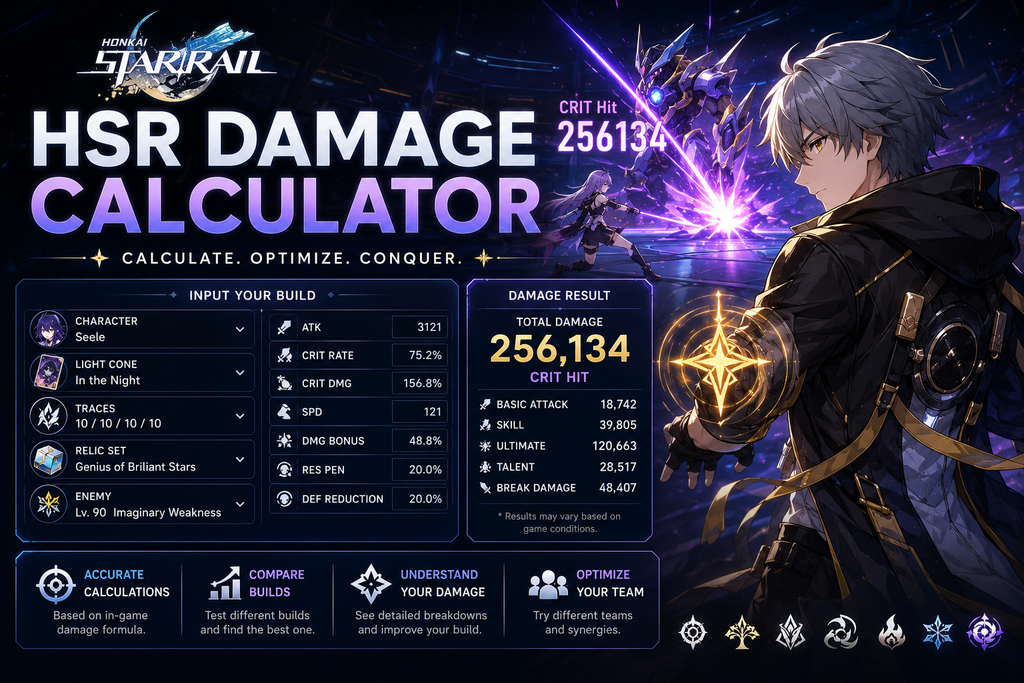
Using the calculator does not need to be complicated. Start by choosing the character you want to test and enter the stats from your current build.
Depending on the options available, you may be able to enter things like:
- ATK
- HP
- DEF
- Crit Rate
- Crit DMG
- Speed
- Effect Hit Rate
- Damage bonuses
- Character level
- Trace levels
- Light Cone effects
- Relic stats
- Eidolons
- Team buffs
- Enemy debuffs
Once your stats are entered, select the attack, skill, or other ability you want to check. The calculator will use the information you provided to estimate the damage.
You can then change a few stats or switch to another build and run the calculation again. This makes it easy to see what happens when you change a Relic, Light Cone, Crit ratio, or other part of your setup.
Why Use a Damage Calculator for Honkai: Star Rail?
Building a character in Honkai: Star Rail usually involves making a lot of small choices. You might have two Relics that look almost equally good, or you may be unsure whether adding more ATK is better than improving your Crit stats.
Looking at the character screen does not always give you the full picture.
An HSR damage calculator lets you put those options side by side and see how they affect the result. For example, you can enter your current build, record the damage, and then replace one Relic with another to see whether the change is actually worthwhile.
It is also useful when planning future upgrades. If you are thinking about improving a Trace or changing your Light Cone, you can test the difference first instead of relying entirely on guesswork.
Understanding HSR Damage
There are several things happening behind a damage number in Honkai: Star Rail. Your character’s stats provide the starting point, while the ability’s scaling and various bonuses determine how that damage is calculated.
The exact formula can vary depending on the character and ability. Some characters mainly scale with ATK, while others can make use of HP, DEF, or other stats. Character-specific effects can also change how certain attacks work.
Crit stats are another important part of the calculation. Crit Rate affects how often you land a critical hit, while Crit DMG affects how much extra damage that critical hit deals. Because the two stats work together, simply having a large number in one of them does not automatically mean the build is better.
Enemy DEF, resistance, weaknesses, buffs, and debuffs can also change the final result. That is why it is useful to look at the whole setup instead of focusing on just one stat.
Compare Different Character Builds
One of the most useful things about an HSR Damage Calculator is that it lets you compare different builds without changing everything in the game.
You can use it to check things like:
- Which Relic setup gives better damage?
- Should you focus more on ATK or Crit?
- How much does a particular Light Cone add?
- Is upgrading a Trace worth it?
- How much extra damage does a team buff provide?
- How much does an enemy weakness change the result?
- What difference does an Eidolon make?
For a useful comparison, try to keep the conditions the same. If you change five different things at once, you may get a higher number, but you will not know which change actually helped.
A better approach is to change one thing at a time. Start with your current setup, change one stat or item, and compare the two results. This gives you a much clearer idea of what is improving your damage.
Test Relics, Light Cones, and Stats
Finding good Relics can take a lot of time, and sometimes the better-looking piece is not necessarily the one that gives you better results.
For example, one Relic setup might give you more ATK, while another gives you a better Crit balance. Instead of judging them only by their individual stats, you can test both setups against the same attack and see how the estimated damage changes.
The same applies to Light Cones. Different Light Cones can provide different stats and passive effects, and their value can depend on the character using them.
By testing each option in the calculator, you can get a better idea of which setup fits your character instead of simply choosing the option with the highest-looking stat.
Test Buffs and Debuffs
Damage in Honkai: Star Rail is not always about the character alone. Team members can provide buffs, while enemies can have debuffs that change how much damage they take.
If the calculator supports these effects, you can include them in your calculations and compare the results. This can be especially useful when you want to know how much a support character is contributing to your team’s overall damage.
You can also compare a character’s damage without buffs to their damage with a full team setup. Just remember that some effects have specific conditions, durations, or stacking rules, so the calculator’s settings should match the situation you are trying to test.
Critical Damage and Consistency
Crit-focused builds can be a little tricky to judge by looking at a single large damage number.
A build with high Crit DMG can produce impressive numbers when a critical hit happens. However, Crit Rate affects how consistently those critical hits occur. Because of this, the biggest possible hit is not always the best way to compare two builds.
When testing Crit-focused setups, it can be useful to look at both critical-hit damage and expected damage over multiple attacks. This gives you a better idea of how the build performs overall rather than focusing on one lucky hit.
The best balance will depend on the character and the rest of your team, so there is no single Crit setup that works perfectly for every situation.
Check Your Results Before Changing Your Build
A damage calculator is best used as a planning tool. It can help you understand how different changes affect your build, but the result may not always match an in-game hit perfectly.
Rounding, character-specific mechanics, buffs, enemy conditions, and other effects can sometimes make a difference. Before comparing results, check that your character level, Traces, enemy settings, buffs, debuffs, and other relevant options are set correctly.
If you are unsure about a particular interaction, it can also be useful to test the same situation in-game and compare the result with the calculator.
Plan Better Upgrades with an HSR Damage Calculator
Upgrading a character in Honkai: Star Rail can take a lot of resources. Before investing in a new Light Cone, farming for better Relics, or spending materials on Traces, it can be helpful to know what kind of improvement you can expect.
An HSR Damage Calculator lets you test those changes first. You can create your current setup, make the planned upgrade, and compare the two results.
This does not mean you always need to chase the biggest damage number. Sometimes a slightly lower-damage build may offer better consistency or work better with your team. The calculator simply gives you more information so you can make the decision that makes sense for your playstyle.
Final Thoughts
An HSR Damage Calculator is a convenient way to experiment with Honkai: Star Rail builds and understand where your damage is coming from. Instead of relying only on character stats or making changes through trial and error, you can compare different Relics, Light Cones, Crit stats, Traces, buffs, and other factors in one place.
The best way to use it is to experiment. Start with your current build, change one thing at a time, and compare the results under the same conditions.
That way, you can get a clearer picture of which upgrades are actually helping your character and make smarter decisions when working on your next build.